 Skip to content

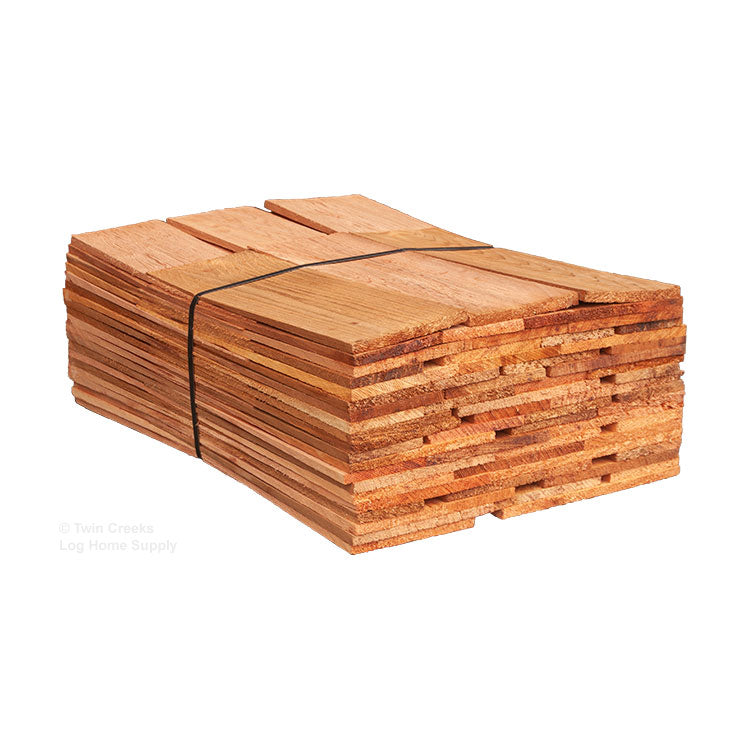
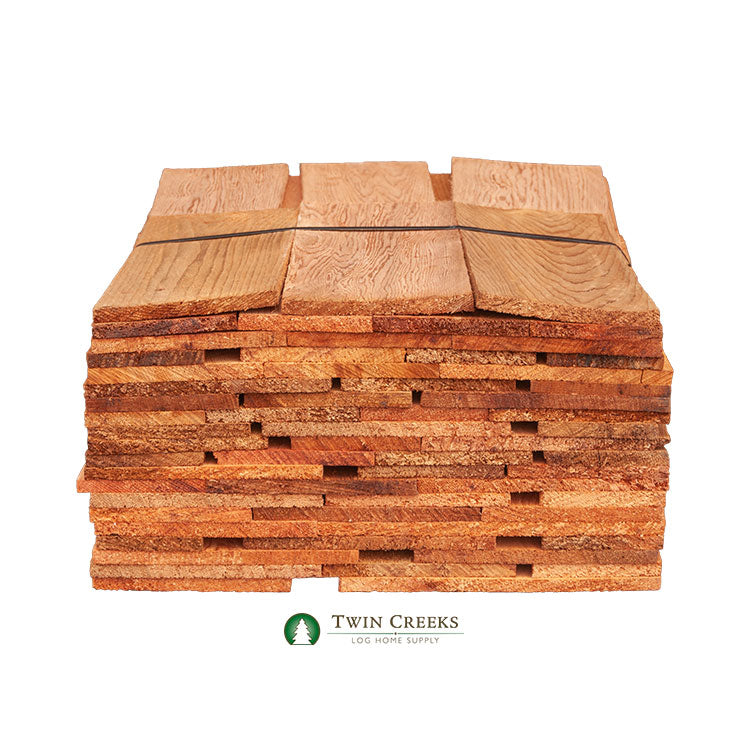
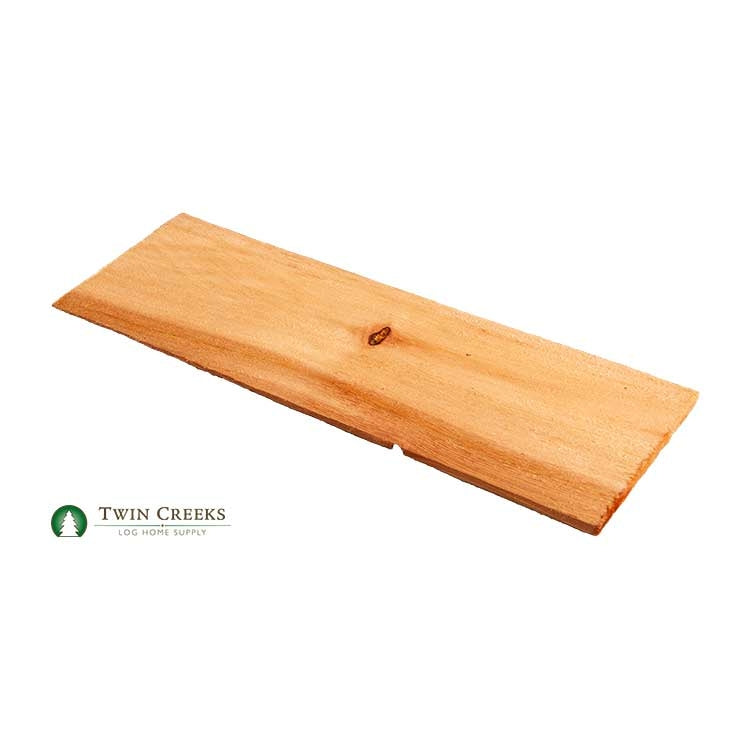


Bundle #2 Grade 18" Perfection Western Red Cedar Shingles
Please call for a custom shipping quote if you need 10 or more bundles.
#2 Grade 18” Perfection Western Red Cedar Shingles add warmth, durability, and timeless charm to your home. While many plastic and composite products on the market attempt to duplicate the look of cedar siding, none match the beauty and distinctiveness of naturally grown cedar. Whether you choose to stain, paint, or allow them to weather naturally to a beautiful silver, real cedar shingles are a low maintenance product that adds texture, durability, insulation, and individuality to your home.
Features & Benefits of Western Red Cedar Shingles:
• Extreme Durability – Cedar Shingles easily withstand harsh weather conditions including heavy wind, rain, and hail.
• Longevity – Western Red Cedar is known as one of the most durable softwoods, and with proper maintenance, Cedar Shingles can beautify your home for decades.
• Energy Efficiency – Cedar offers excellent insulation for your home, keeping it warmer during cold months, while allowing your home to breathe and stay cooler during the warmer months, all while maintaining a low carbon footprint.
• Termite Resistance – Western Red Cedar wood is naturally resistant to termites.
• Ease of Installation – Great for Do-It-Yourself projects, Cedar Shingles are easy to install.
• Versatility – Western Red Cedar Shingles can be used with many different architectural styles, affording you the option of a home covered in beautiful Cedar wood, or simply a small rustic accent area on an otherwise traditional home.
• Quality Milling – We sell only the highest quality Cedar products.
• Adaptability – Cedar Shingles are manufactured to be used on both interior and exterior wall surfaces.
Product Specifications:
• Packaging: Standard roofing-style bundle secured with a metal strap.
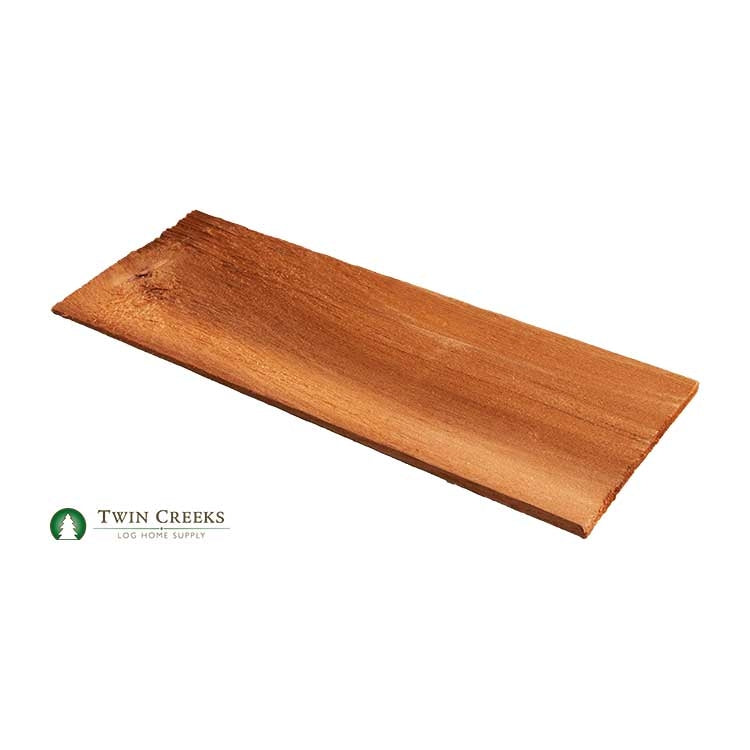
• Length: 18" (Perfection)
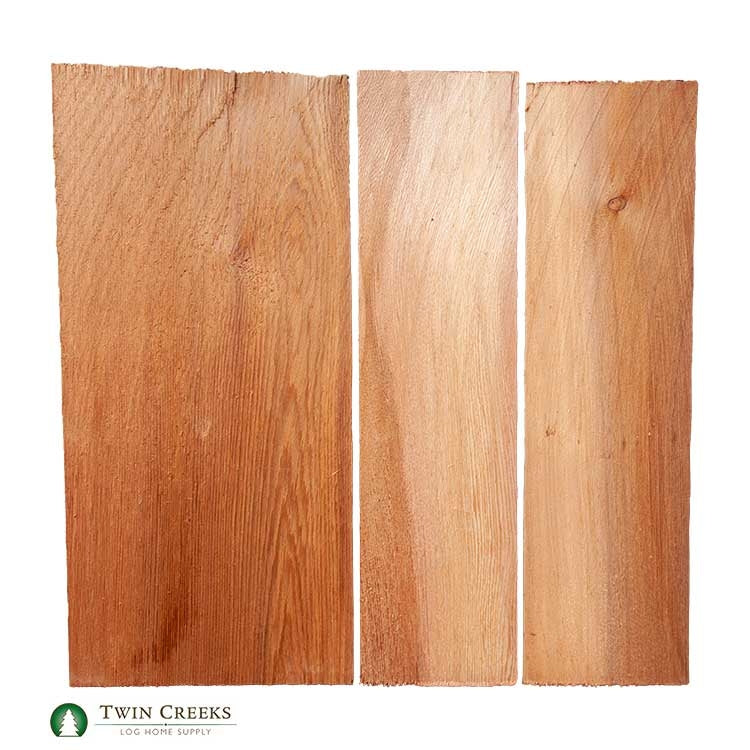
• Grade: Number 2 Grade (Red Label). Limited sapwood and flat grain is allowed. Limited knots and defects are allowed above the clear portion.
• Texture: Sawn-Face Texture
• Thickness: 5/2-1/4" (5 shingle “butts” stacked together should measure 2 ¼” thick)
• Width: Width of shingles will vary, generally between 4" and 10". The minimum width is 4 inches with a minus tolerance down to 3 inches in up to 20% of the bundle.
• Shipping Options: These bundles can be shipped via UPS within a cardboard box or can be palletized if shipped by a trucking method.
Coverage Rate Information:

• Each bundle is sized to cover 25 square feet of wall if applied at a 5-1/2" shingle exposure. The chart above provides a conversion for coverage at different exposures.
• When using double coursing, this product has a maximum exposure of 10".
• When using Single coursing, this product has a maximum exposure of 7".
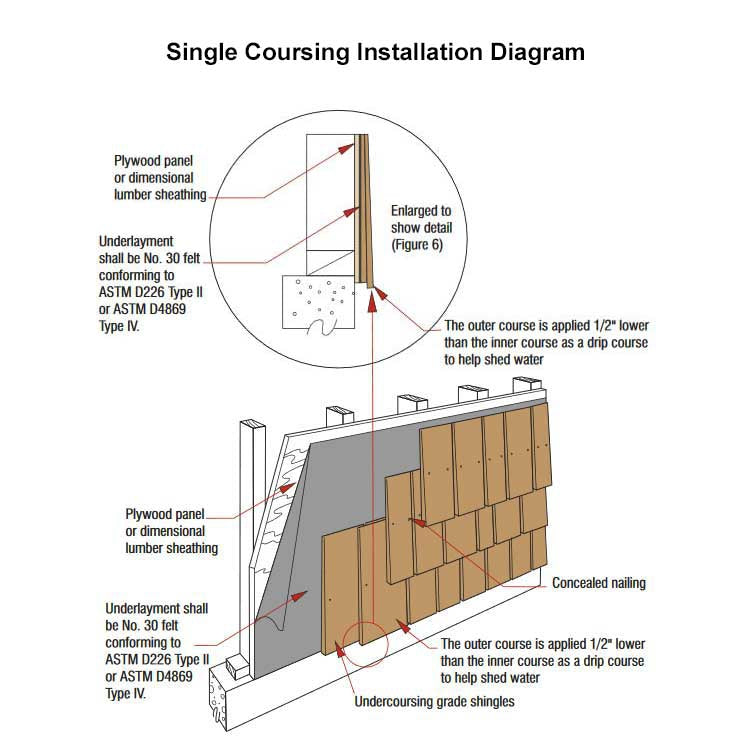
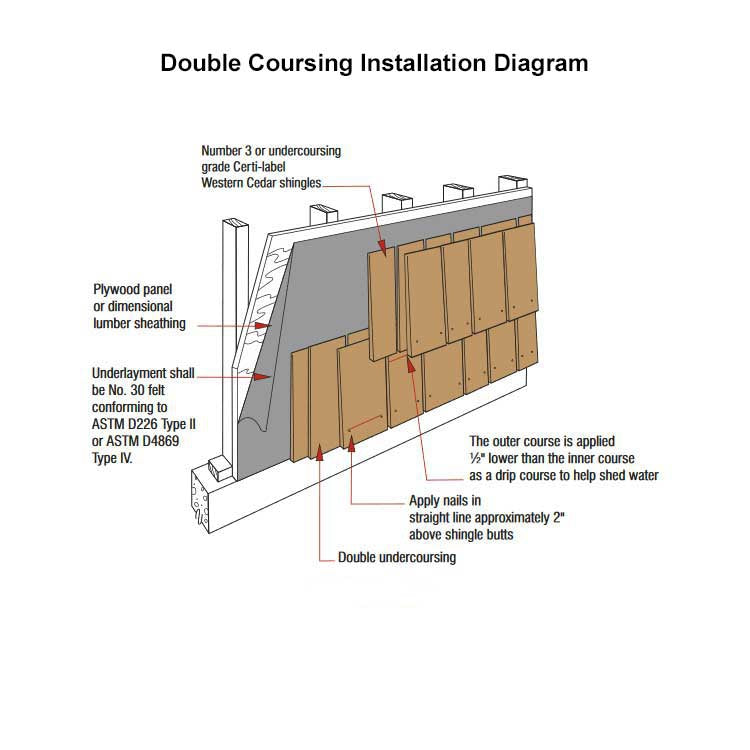
Single Coursing Vs. Double Coursing Application Methods:
• Using the single coursing application method, the shingles are installed with one layer of shingles per run.
• Using the double coursing method, two shingles are installed on top of each other on every layer. This method allows more of the face of each shingle to be exposed, providing more square footage of coverage from each box of shingles. Double exposure application also saves money on material and produces a more noticable shadow line.
Estimating Cedar Shingles:
1. Measure the amount of square footage you have to cover.
2. Using the chart above, identify the amount of coverage per box at your desired exposure.
3. Divide the square footage of coverage needed by the square footage per box value that you just selected from the chart.
Example: 500 square feet of wall needs to be covered using #2 Grade 18" Cedar Shingles. The highest level of exposure is desired, therefore the shingles should be installed as a double course with a 10" exposure. At a 10" exposure, each bundle of shingles should yield 45 square feet of coverage. So, divide the 500 square feet of wall coverage by the 45 square feet of coverage per bundle (500/45= 11.1 bundles). Since the calculation indicates that a partial bundle is required, round up to 12 bundles to ensure that enough shingles will be available to complete the job.
Product Resources:
Cedar Shake and Shingle Product Selection Guide
Cedar Shake and Shingle Specification Guide
Basics Guide for Cedar Shakes and Shingles
CSSB Exterior and Interior Wall Manual
CSSB New Roof Construction Manual
|
Additional Technical Resources for 18” Perfection Western Red Cedar Shingles: Application Notes: Single Coursing Western Cedar Shingle Installation: Finishing Cedar Shingles: Nails: Staples: |
Product Questions
-
How many running feet does this cover?
Bundles of Cedar Shingles will cover different amounts of wall square footage depending on the exposure (how much of the butt end of the shingle you show). With 18" long shingles, carpenters will generally install them with the exposed ends somewhere between 5" and 10" long.
CSSB, the grading organization for cedar shingles, provides a helpful chart showing how much square footage yield you can expect at different exposures:You can see here that you can expect 32 square feet of coverage per bundle if you choose 7" of exposed end.
Since you mentioned running feet in your question, it's also helpful to know that CSSB requires that #2 grade shingles have greater than 635 inches of “on grade” shingles per bundle to meet grade.
-
What is indicated with "Perfection" in the name?
Perfection just indicates that the shingle is 18" long. Other cedar shingle sizes have similar nicknames: 16" shingles are also referred to as "Fivex" shingles and 24" shingles are also referred to as "Royals".
DETAILS
#2 Grade 18” Perfection Western Red Cedar Shingles add warmth, durability, and timeless charm to your home. While many plastic and composite products on the market attempt to duplicate the look of cedar siding, none match the beauty and distinctiveness of naturally grown cedar. Whether you choose to stain, paint, or allow them to weather naturally to a beautiful silver, real cedar shingles are a low maintenance product that adds texture, durability, insulation, and individuality to your home.
Features & Benefits of Western Red Cedar Shingles:
• Extreme Durability – Cedar Shingles easily withstand harsh weather conditions including heavy wind, rain, and hail.
• Longevity – Western Red Cedar is known as one of the most durable softwoods, and with proper maintenance, Cedar Shingles can beautify your home for decades.
• Energy Efficiency – Cedar offers excellent insulation for your home, keeping it warmer during cold months, while allowing your home to breathe and stay cooler during the warmer months, all while maintaining a low carbon footprint.
• Termite Resistance – Western Red Cedar wood is naturally resistant to termites.
• Ease of Installation – Great for Do-It-Yourself projects, Cedar Shingles are easy to install.
• Versatility – Western Red Cedar Shingles can be used with many different architectural styles, affording you the option of a home covered in beautiful Cedar wood, or simply a small rustic accent area on an otherwise traditional home.
• Quality Milling – We sell only the highest quality Cedar products.
• Adaptability – Cedar Shingles are manufactured to be used on both interior and exterior wall surfaces.
Product Specifications:
• Packaging: Standard roofing-style bundle secured with a metal strap.
• Length: 18" (Perfection)
• Grade: Number 2 Grade (Red Label). Limited sapwood and flat grain is allowed. Limited knots and defects are allowed above the clear portion.
• Texture: Sawn-Face Texture
• Thickness: 5/2-1/4" (5 shingle “butts” stacked together should measure 2 ¼” thick)
• Width: Width of shingles will vary, generally between 4" and 10". The minimum width is 4 inches with a minus tolerance down to 3 inches in up to 20% of the bundle.
• Shipping Options: These bundles can be shipped via UPS within a cardboard box or can be palletized if shipped by a trucking method.
Coverage Rate Information:
• Each bundle is sized to cover 25 square feet of wall if applied at a 5-1/2" shingle exposure. The chart above provides a conversion for coverage at different exposures.
• When using double coursing, this product has a maximum exposure of 10".
• When using Single coursing, this product has a maximum exposure of 7".
Single Coursing Vs. Double Coursing Application Methods:
• Using the single coursing application method, the shingles are installed with one layer of shingles per run.
• Using the double coursing method, two shingles are installed on top of each other on every layer. This method allows more of the face of each shingle to be exposed, providing more square footage of coverage from each box of shingles. Double exposure application also saves money on material and produces a more noticable shadow line.
Estimating Cedar Shingles:
1. Measure the amount of square footage you have to cover.
2. Using the chart above, identify the amount of coverage per box at your desired exposure.
3. Divide the square footage of coverage needed by the square footage per box value that you just selected from the chart.
Example: 500 square feet of wall needs to be covered using #2 Grade 18" Cedar Shingles. The highest level of exposure is desired, therefore the shingles should be installed as a double course with a 10" exposure. At a 10" exposure, each bundle of shingles should yield 45 square feet of coverage. So, divide the 500 square feet of wall coverage by the 45 square feet of coverage per bundle (500/45= 11.1 bundles). Since the calculation indicates that a partial bundle is required, round up to 12 bundles to ensure that enough shingles will be available to complete the job.
Product Resources:
Cedar Shake and Shingle Product Selection Guide
Cedar Shake and Shingle Specification Guide
Basics Guide for Cedar Shakes and Shingles
CSSB Exterior and Interior Wall Manual
CSSB New Roof Construction Manual
MORE INFORMATION
|
Additional Technical Resources for 18” Perfection Western Red Cedar Shingles: Application Notes: Single Coursing Western Cedar Shingle Installation: Finishing Cedar Shingles: Nails: Staples: |
REVIEWS
PRODUCT QUESTIONS
Product Questions
-
How many running feet does this cover?
Bundles of Cedar Shingles will cover different amounts of wall square footage depending on the exposure (how much of the butt end of the shingle you show). With 18" long shingles, carpenters will generally install them with the exposed ends somewhere between 5" and 10" long.
CSSB, the grading organization for cedar shingles, provides a helpful chart showing how much square footage yield you can expect at different exposures:You can see here that you can expect 32 square feet of coverage per bundle if you choose 7" of exposed end.
Since you mentioned running feet in your question, it's also helpful to know that CSSB requires that #2 grade shingles have greater than 635 inches of “on grade” shingles per bundle to meet grade.
-
What is indicated with "Perfection" in the name?
Perfection just indicates that the shingle is 18" long. Other cedar shingle sizes have similar nicknames: 16" shingles are also referred to as "Fivex" shingles and 24" shingles are also referred to as "Royals".

